Feeling overwhelmed by your to-do list? It’s time for a fresh approach. Whether you’re figuring out what new tasks to start, which processes to stop, or where to make improvements—including sustainability initiatives—this simple method will help you cut waste and boost efficiency. Think of it as a game-changer for your workflow, empowering your team to work smarter, not harder, while making real progress. Change doesn’t have to be overwhelming; it’s about making strategic, impactful adjustments that lead to better results, smoother workflows, and more sustainable outcomes.
A Fresh Approach to Tackling Chaos
Ever feel like your to-do list is out of control? This simple method helps bring clarity, meaning, and direction to your tasks. Whether you’re deciding what new actions to take, which processes need tweaking, or which habits to drop, this approach will streamline your workflow, boost productivity, and make your routine more manageable.
Even the best processes lose their effectiveness over time or fail to take advantage of the improved availability of better tools and templates, signaling the need to reassess. While big changes can be costly, small adjustments often get things back on track. The method I’ll share is perfect for team brainstorming, making it easier to identify areas for improvement together.
Think of it like tidying up a familiar room. Some things need to go, while others just need a small fix. This tool helps you do the same with your work, identifying what needs to change, what new actions to start, and what habits to stop.
Importantly, it’s also about working smarter with sustainability in mind. Rethinking processes to reduce waste, conserve resources, and adopt eco-friendly practices not only improves efficiency but also builds a more sustainable work environment for the future.
What to Start
Think of yourself as a gardener, planning to refresh and revive your garden. To improve a process or outcome at work or in a volunteer setting, you need to plant new “seeds”—ideas and actions that hold the potential to bring positive change. These are the things you want to start doing to make a meaningful impact.
Ask yourself: What new tools, strategies, or approaches could help streamline work, solve problems, or improve how people experience your organization or team? It might be a fresh approach to a recurring issue or an idea that could make things more efficient. Like planting new flowers in a garden, these initiatives will need your time and attention to grow and flourish.
By starting these key actions, you create opportunities for improvement and success and build an environment that thrives on new ideas and growth.
What to stop
When we talk about what needs to stop in the workplace, we’re focusing on behaviors and habits that hold everyone back. Think of gossip—it’s like a poison that erodes trust and divides teams. Then there’s micromanagement, which stifles creativity and leaves people feeling frustrated and demotivated. And multitasking? While it might seem productive, it often leads to mistakes and burnout. By eliminating these negative behaviors, we can create a more positive, collaborative, and efficient work environment.
Stopping isn’t just about behaviors, though; it’s also about simplifying how we work. This means cutting out unnecessary steps, avoiding redundant processes, and leveraging technology to make tasks easier and faster. It’s about working smarter, not harder.
The key to success is getting everyone involved. When the team collaborates and shares insights, it becomes easier to identify which tasks or processes don’t add value—and figure out the best ways to eliminate them. This not only streamlines workflow but also helps the entire team feel more aligned, motivated, and connected.
What to change
When identifying what needs to be changed, it’s about finding those processes or tasks that work to some extent but aren’t quite hitting the mark. These are not things you want to stop completely, but they could benefit from refinement or improvement. The goal is to enhance their efficiency or effectiveness rather than overhaul them entirely.
This step is about finding out with your team where bottlenecks occur, where confusion arises, or where inefficiencies creep in. Perhaps you uncover small tweaks that make a big difference. For example, a task might be taking longer than necessary because of an outdated step, or perhaps communication between teams could be improved to streamline a handoff.
Other possible candidates for change may lie in opportunities to improve: Are there tasks that could be automated? Is there a process that could be shortened or simplified without sacrificing quality? Sometimes it’s as simple as adjusting timelines or reallocating resources to better fit the demands of a project.
The key is not to throw out processes that have potential but to fine-tune them. By making small, thoughtful adjustments, you can improve the overall flow and outcomes. Involving the entire team in identifying these areas for change ensures that the solutions are practical, realistic, and beneficial for everyone.
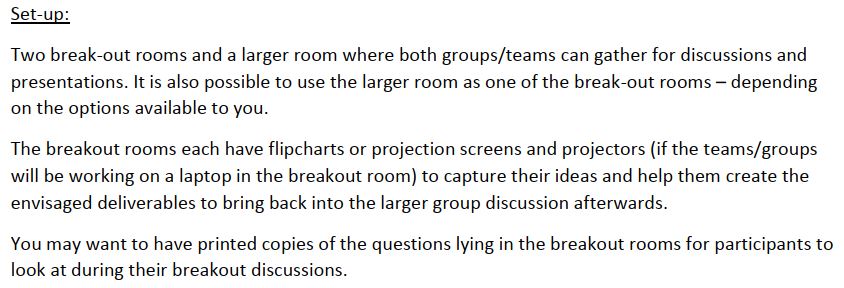
Setting up time with the team
To kick off improvements, start by gathering input from everyone involved in the workflow. Set up a dedicated meeting where each person can share their unique insights. By involving the whole team, you’ll gain a diverse range of perspectives, helping you identify opportunities for improvement far more effectively than if you were working alone.
To make the session productive, team up with coworkers and dedicate about an hour to look for ways to enhance how you work, the environment you work in, or how your organization delivers value—whether it’s to customers, clients, or those benefiting from your volunteer efforts.
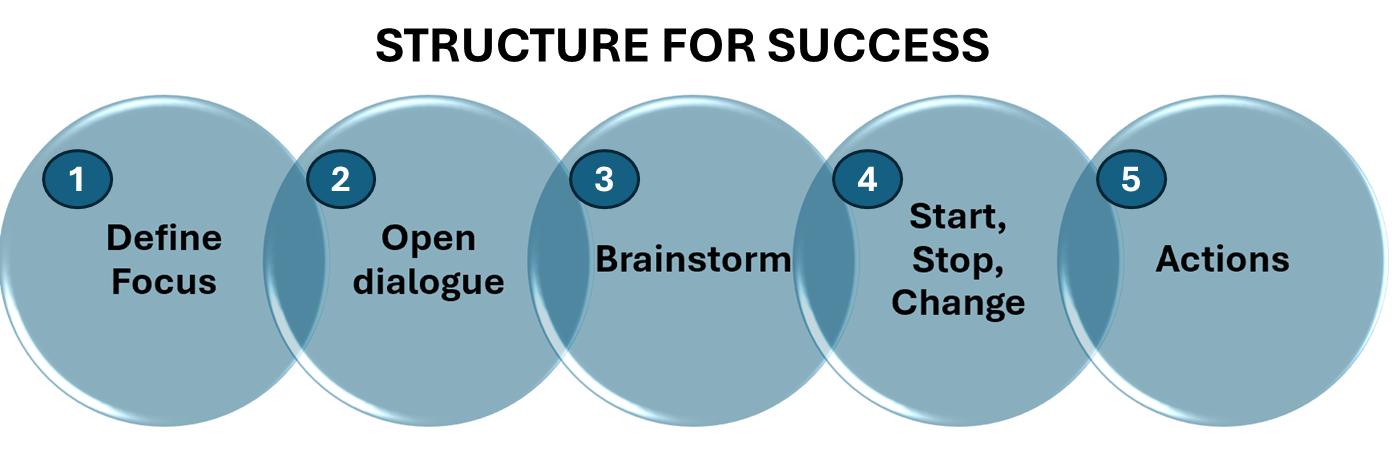
Here’s how to structure your session for success:
- Define the Focus: Clearly outline what the session is about. Are you looking to improve a specific process, boost safety, streamline workflows, or enhance customer/recipient satisfaction? Make sure everyone understands the goal before diving into discussions.
- Encourage Open Dialogue: Create a safe space for everyone to share their ideas, frustrations, and suggestions. Emphasize that all feedback is valuable and will contribute to positive change.
- Brainstorm Together: Work as a group to explore ways to make things better, smarter, and safer. This could involve improving the way tasks are done, optimizing the workspace, or enhancing the delivery of value to customers or the community.
- Capture Ideas: Use Stop, Start, and Change flipchart pages to organize ideas. After brainstorming, categorize the suggestions:
- Stop: What isn’t working and needs to stop?
- Start: What new actions, processes, or tools should be introduced?
- Change: What existing processes could be improved with a few adjustments?
- Start: What new actions, processes, or tools should be introduced?
5. Assign Actions: Once ideas are gathered, assign ownership for each action. Ensure there’s follow-up so the insights gained from the session translate into real improvements. Also, set up a follow-up recurring meeting to review how things are going to discuss if you need to change or improve how you are implementing actions to be more successful and avoid obstacles to success.
By following this structure, you’ll ensure that your team collaborates effectively and walks away with actionable steps to make meaningful changes.
Keep Stakeholders in the Loop
After the meeting, it’s important to keep key stakeholders, such as your supervisor or others involved in the implementation, informed about the progress. Provide them with an update on the discussions, including the proposal for items to start, stop, or change. This transparency ensures they are aware of the team’s efforts and can offer support as needed. Additionally, ask for their feedback and suggestions. This will help ensure that no key opportunities for improvement are missed and that the plan is as comprehensive as possible. Engaging others in this way enhances collaboration and strengthens the overall success of the initiative.
Now It’s Your Turn to Change the Game
Taking a structured approach to what you start, stop, and change can really improve how your team works and help you reach your sustainability goals. I encourage you to take a fresh look at your team, your environment, and how you get things done. Find ways to not only make customers happier and save money, but also to reduce waste, save resources, and lessen your impact on the planet. Involving your team in this process will help everyone work smarter and feel more motivated as they see their ideas making a difference. Whether you’re working or volunteering, these changes can lead to a more rewarding and sustainable experience. Now is the time to act—start looking for where you can make a real difference for your team and the environment.